
Phone:
+86-139-5121-3963
Views: 0 Author: Site Editor Publish Time: 2026-09-09 Origin: Site


The clinical landscape of minimally invasive surgery is evolving rapidly today. Surgeons are increasingly moving away from traditional blind abdominal entry methods. Techniques like the Veress needle or Hasson approach are making room for direct visualization. Direct visualization is now becoming the standard of care globally.
Primary port placement remains one of the most critical steps in laparoscopic procedures. Blind entry poses unquantifiable risks for patients. This is particularly true for individuals carrying previous abdominal scars or dense adhesions. Such blind approaches often lead to severe vascular or bowel injuries. Reducing these entry-related complications is our primary objective.
This article serves as a comprehensive technical guide to mastering visual entry. You will learn optimal clinical workflows and essential procedural steps. We will also provide a robust framework for evaluating these systems during facility procurement.
Direct Visualization: Optical trocars allow surgeons to monitor penetration through distinct tissue layers (fascia, muscle, peritoneum) in real-time, significantly mitigating entry-related complications.
Procedural Steps: Safe insertion requires meticulous synchronization between scope insertion, controlled downward pressure, and continuous monitor observation.
Evaluation Criteria: High-quality optical trocars are defined by their lens clarity, tip geometry (bladeless vs. bladed), and seal durability during instrument exchange.
Procurement Focus: Standardization across a surgical department requires assessing laparoscope compatibility (usually 0-degree, 10mm/12mm) and training overhead.
Primary port placement accounts for a significant percentage of laparoscopic complications. Surgeons historically relied on tactile feedback when using a Veress needle. You push through the fascia, feel a distinct "pop," and hope you are safely inside the peritoneal cavity. Blind entry presents unquantifiable risks in patients facing previous abdominal surgeries. Adhesions can tether the bowel directly to the anterior abdominal wall. A blind needle insertion in these cases can easily cause catastrophic organ perforation.
Immediate visual feedback changes this dynamic entirely. The primary advantage of an optical trocar is transparency. You see exactly what the instrument tip is touching. Immediate visual feedback allows for immediate course correction. If you observe dense scar tissue, you can angle the cannula or halt the insertion. This prevents minor issues from escalating into major surgical emergencies. We rely on this real-time data to navigate complex anatomies safely.
Adopting this technology requires meeting specific success criteria. Hospitals need to see a measurable reduction in entry times. Surgeons should experience fewer minor bleeding incidents at the port site. Most importantly, the transition must eliminate major retroperitoneal vascular injuries. When facilities track these metrics, the clinical argument for visual entry becomes undeniable. Direct visualization protects both the patient and the surgical team.
Safe insertion demands a strict clinical workflow. Surgical teams must follow standardized protocols to maximize patient safety. Skipping steps can compromise visibility and increase complication risks.
Verify compatibility: Ensure the device matches your laparoscope. Most standard systems require a 10mm or 12mm 0-degree scope.
Lock the scope: Insert the laparoscope into the cannula. Lock the scope properly into the trocar handle. The distal tip of the scope must sit flush inside the clear window.
Prevent fogging: Pre-warm the scope lens. Apply high-quality anti-fog solutions. This prevents smudging during tissue entry when temperature changes occur.
You must make an adequate skin incision to begin. This incision usually happens at the umbilicus. A proper incision prevents skin drag, which can impede smooth insertion. Skin resistance can force you to push harder than necessary, reducing your control. Elevating the abdominal wall is often the next step. You should lift the tissue if required by hospital protocol or specific patient anatomy. Lifting creates a safe distance between the abdominal wall and underlying viscera.
Begin applying continuous, controlled pressure. You will use a twisting or oscillating motion depending on the specific thread or tip design. Do not use brute downward force. Look directly at the surgical monitor. You will identify the subcutaneous fat first. Next, you will see the white, fibrous anterior rectus sheath. The red fibers of the rectus muscle appear shortly after. Finally, you will pass the posterior sheath and approach the thin, translucent peritoneum.
You must stop advancement immediately once the peritoneal cavity is breached. The viscera will suddenly become visible on the monitor. Pushing any further risks hitting the bowel or major blood vessels. Control your wrist movements carefully during this final breach.
You have successfully entered the cavity. Now you must safely unlock and remove the laparoscope. Hand it back to the scrub nurse. Keep the cannula perfectly still. Connect the CO2 tubing directly to the stopcock on the cannula housing. Open the valve to begin pneumoperitoneum establishment. Monitor the initial intra-abdominal pressure carefully. High initial pressures indicate improper placement or partial fascial embedding.
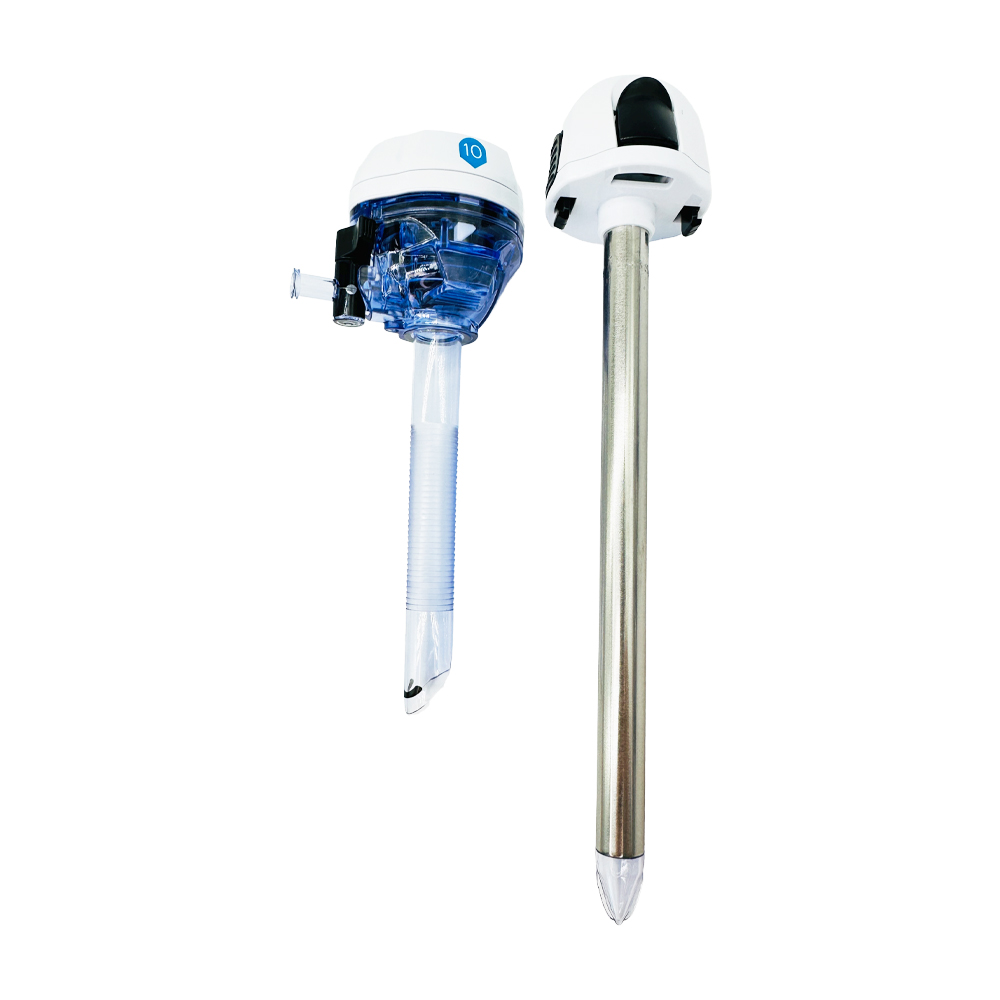
Procurement teams face a crowded market. Choosing the right device requires analyzing specific engineering features. A high-quality laparoscopic trocar impacts both patient outcomes and daily surgical efficiency.
You should assess bladeless designs carefully. Bladeless tips spread rather than cut tissue. They dilate the muscle fibers instead of severing them. This natural dilation results in smaller fascial defects. Smaller defects significantly reduce postoperative port-site hernia risks. Bladed options still exist, but the industry is moving heavily toward bladeless geometry for better wound healing.
The material of the clear tip dictates your visibility. Poorly manufactured polymers can distort the image. They reduce light transmission from the laparoscope. You need maximum clarity to differentiate between vital tissue layers. Image distortion can lead to misjudging the distance to the bowel. Always test the optical clarity in a simulated environment before committing to a bulk purchase.
You must evaluate universal seals for durability. Surgeons perform multiple instrument exchanges during a typical procedure. Weak seals will tear or degrade quickly. Degradation causes rapid gas leakage. Loss of pneumoperitoneum collapses the surgical workspace, creating a dangerous situation. Look for robust, multi-layer silicone seals that accommodate various instrument diameters seamlessly.
Analyze the cannula’s external threading. Aggressive threading ensures better abdominal wall retention. High retention prevents accidental pull-outs during complex surgery. Unplanned pull-outs interrupt the procedure and risk losing cavity access. Furthermore, handle ergonomics matter greatly. The surgeon needs a comfortable, secure grip to apply controlled rotational pressure. Poor ergonomics lead to hand fatigue and jerky insertion movements.
Evaluation Framework Summary
| Evaluation Dimension | Key Clinical Benefit | What to Look For |
|---|---|---|
| Tip Geometry | Reduces hernia risks and bleeding | Bladeless, tissue-separating wings |
| Optical Clarity | Ensures accurate tissue identification | High light transmission, zero distortion |
| Seal Integrity | Maintains stable pneumoperitoneum | Durable multi-layer universal seals |
| Thread Design | Prevents accidental pull-outs | Aggressive external ridges, deep threads |
Even the best devices come with implementation challenges. Clinical teams must recognize common risks. They must also know how to troubleshoot them instantly in the operating room.
Risk: Lens Smudging/Fogging: Tissue fluid or subcutaneous fat often obscures the view during insertion.
Mitigation: Use proper wiping techniques before insertion. Avoid applying excessive downward pressure. Hard pushing forces fat tissue directly into the lens housing. Let the tip do the separating work.
Risk: "Tenting" of the Peritoneum: Sometimes the device pushes the peritoneum inward without actually piercing it. This creates a false sense of distance.
Mitigation: Maintain a sharp, high-quality trocar tip. Use appropriate wrist oscillation rather than brute downward force. A slight twisting motion helps the tip bite into and breach the slippery peritoneal lining.
Compliance & Safety Standards: You must ensure the chosen device aligns with strict FDA/CE guidelines. Check your hospital sterilization protocols if reusable components are involved. Ensure proper biohazard disposal protocols are followed if the device is fully disposable. Regulatory compliance protects the facility from legal liabilities.
Rolling out a new surgical device requires strategic planning. Procurement and clinical directors must collaborate closely. Financial considerations must balance with patient safety outcomes.
We must examine the cost-to-outcome ratio carefully. Visual entry systems often carry a slightly higher per-unit cost compared to basic blind-entry needles. However, you must balance this against the potential legal and clinical costs of entry complications. A single major vascular injury can result in massive litigation costs. It also causes prolonged ICU stays and severe patient harm. Investing in visual entry mitigates these catastrophic financial and clinical risks.
Inventory consolidation is another major factor. Ask yourself if one type of access device can serve multiple specialties. Can gynecology, bariatrics, and general surgery share the same inventory? Standardizing a single platform simplifies supply chains. It reduces training overhead for scrub nurses. It also minimizes storage space requirements in crowded supply rooms.
Your next-step actions should focus on hands-on testing. Set up a clinical trial period. Bring in key surgical stakeholders to evaluate the devices. Test them for ergonomics, optical clarity, and seal reliability in real-world OR conditions. Collect objective feedback from both surgeons and nursing staff before finalizing any contracts.
Mastering visual entry pairs excellent surgical technique with precise instrument engineering. You protect your patients by watching every tissue layer separate in real time. Direct visualization eliminates the dangerous guesswork associated with blind insertions.
Transitioning to this method requires careful product selection. You must choose a device that does not compromise on optical clarity. You also need robust seal integrity to maintain a safe surgical workspace. Cutting corners on these features defeats the purpose of upgrading your equipment.
Clinical directors and procurement teams should take action today. Request technical specifications from trusted manufacturers. Ask for clinical samples to evaluate in your own operating rooms. Standardizing this technology will elevate your facility's safety profile immediately.
A: Optical trocars can be used for direct optical entry prior to insufflation, which is one of their primary advantages. You enter the cavity visually and insufflate afterward. However, some surgeons still prefer using a Veress needle first to create a pneumoperitoneum, depending on specific patient history and anatomical concerns.
A: Standard 10mm or 12mm optical trocars typically require a standard 0-degree laparoscope of corresponding size. Angled scopes (like 30-degree) will not provide the necessary forward-facing view. Compatibility must always be verified per the manufacturer's specific guidelines before surgery.
A: The industry standard has shifted heavily toward bladeless designs. Bladeless tips separate and dilate tissue rather than cutting it, which helps minimize fascial defects. Though bladed versions do exist, bladeless models are highly preferred for their superior postoperative wound healing characteristics.
A: Bladeless optical tips dilate tissue fibers rather than transecting them. When you remove the cannula at the end of the procedure, the muscle and fascia contract naturally. This natural contraction significantly lowers the rate of port-site hernias compared to sharp, cutting blades.


